Still trying to figure out a way of attaching these Panther G skirts. I super glued the rear end on and then attempted to use some of my epoxy putty to bridge the gap but the putty just isn't cooperating with me. The skirts are on, I just have to make it look good now since that is too much to ask of BF.
Next, the staff car I got in my Flak36 boxed set had a miscast base. Something I really hate about most of the transport vehicles in this game and the Panzerwerfer and Katyusha boxed sets is that the vehicle is molded onto the base. This is all good and gravy unless you either don't really want the base on (if for some reason you wanted to field Panzerwerfers without 5 or more crew), the base is damaged (which happens all too often), or if like me you simply hate all that resin under the vehicle that shouldn't be there. Since the staff car is a cheap replacement in case I screwed it up, I set out to test out what I could do about the damaged base. Here is how it looked before.
I got my dremel out and cut off what I could with a cutoff wheel. I then used a cutting bit to chunk out more of the larger material. Finally I used a grinding wheel to core it out and smooth it over. The only bad part about this process is the wheels are now flat at the bottoms (not such a big deal if you're mounting it on a new base with grass), and it is extremely time consuming. Honestly, I would rather pay more for the Panzerwerfers and support vehicles that aren't cast onto their bases than deal with anymore resin dust. I think it turned out ok. At least this vehicle won't have a mishapen base anymore.
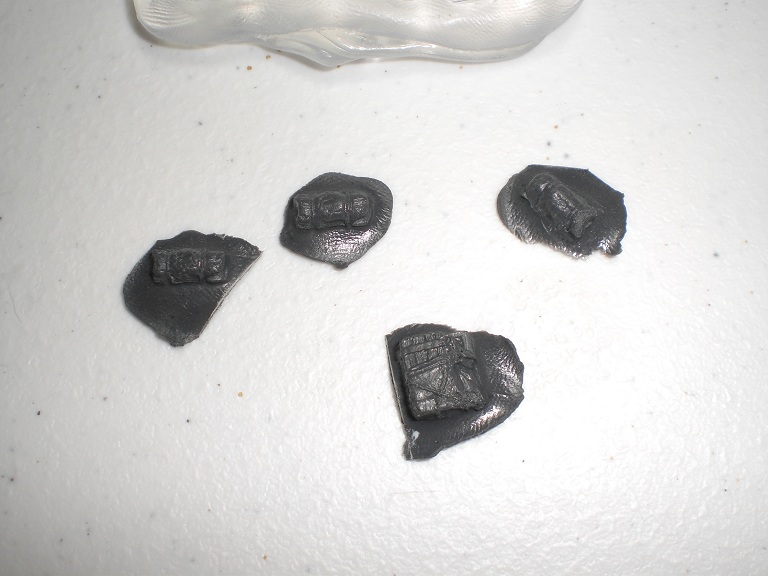
Last up is the King Tiger you see behind the staff car. This is my first KT and I just love the model. It is such an awesome looking tank but for some reason it just doesn't look as scary when you put it next to a Panther which is pretty much the same size model. You can see the converted to plastic barrel from one of my previous posts, plastic hull MG from the Panther kit, and white track links. I reheated the mold of stowage I had cast in previous posts and made a cast of the track links for the KT. I think it could be better but I'm hoping some paint will make that happen for me. I am still undecided as to what paint job I will be using for my Germans. As of right now I am leaning more towards generic grey as opposed to building an army based around a specific unit. It isn't flashy but it is something you don't see often, if ever, and I don't have an airbrush to do the 3 tone paint job everyone else and their mom does.
Later!
19 June 2012
18 June 2012
New Panther G Models
Despite not playing Germans, I was so excited by how great the new Panther G platoon box looked that I preordered one and then impatiently waited for it to arrive. When it did get here, it was like freakin christmas or something. I tore into the box and laid everything out and that is when the nightmare started. First, two of the tanks had their exhausts broken off. One of them was just the exhaust tips broken off and the pieces were not present in the box so now one of my tanks has no exhausts. I have filed at least 5 customer service claims with Battlefront since March and am leery of them thinking I am taking advantage of them so I did not file a claim on these models. The other tank's exhaust was completely broken off but it was a clean break and the piece was present in the box so it glued on nicely. Upon doing an inventory I then realized that every single piece of metal that was supposed to come with this kit did not get packed into my box. That was too much and I filed the customer service claim. They explained that all the metal parts come packed in a baggy which explained why I didn't receive any, magnets included. Shrugging off the initial disappointment, I set off on an adventure to get the tanks assembled. They go together extremely well and look absolutely fantastic! I am nearly blinded by the beauty of the tracks. What a great looking tank even if my home cast tarp from the previous post might be a bit big for the turret.
And that's when the real problems at least for me started. The tracks. Either they are simply way too wide or the part of the hull that hangs over them isn't wide enough. I didn't know that panther tanks tapered from the back to front either but they sure as hell do on these models.
Notice how at the rear of the tank you cannot see tracks but as you get to the front of the tank near the fenders you can see tracks? One might think this is not a big deal. Well that "one" also probably doesn't want to attach the skirts to their tank either. The skirts should be flush with the hull, not touch the tracks, and should be vertical or ever so slightly angled. The problem with this cast is that you cannot mount the skirts the way they were meant to be mounted without using a hell of a lot of filler putty (that I currently do not have available in my hobby supplies). The alternative is to mount the skirts at an extreme angle like the following.
Those are pics with the skirt sticky tacked on. I will NOT be building my lovely tank like this. How atrocious. Here are a couple of pics of how it should look but with the very obvious gap near the front fender.
I went to BF's website and looked at their web article. Sure enough they have the same tank with the taper in the hull and of course do NOT have the skirts attached because they CAN'T attach them without excessive modification.
I added the straight red lines so you can clearly see what straight is and that their hull tapers at the front leaving the gap. I then noticed on the assembly pictures that they did have one with the skirt attached and you can clearly see a gap at the front near the fender.
I then decided to look at some of their other pics and looked at the box and made what I think is a shocking discovery. They advertised their new panther g tanks right on the box art with their old metal panther parts. I couldn't freaking believe it. Just look at this picture for my evidence.
This is the picture provided on their website and the box. If you look closely where I have made the circles you can see several glaring inconsistencies with the models I have received. First look at the gun barrels. All of the black markings are holes but they are inconsistent with eachother. The new panther kit has plastic barrels so all of the holes should be identical. These are not, so that leads me to believe they are the old metal barrels with the holes individually drilled out. Next look at the hull MG on the bottom right vehicle. It looks nothing like the hull MG I received in my kit which you can see in my pics above. Why? Because it is the old metal hull MG. Next and most importantly look at the right fender area. What do you see? You see no huge gap between the hull and the skirts and that the skirts are mounted vertical the way they should be. Next you can also see that the fender light is thinner at the base and doesn't look like a glob of plastic like the over-simplified plastic fender lights do. What does that mean? It means that the fender is the old metal one and that either the hull is straight the way it should be or the track isn't too wide to interfere with the skirt. Lastly, I forgot to mark it but have a look at the tracks themselves. The details on them are nowhere near as good as the new plastic tracks have. They aren't even in the same book let alone the same page. They are obviously the old metal tracks which are thinner than the new plastic ones.
Based on this information I have deduced that the plastic parts included with the panther g box set must have been a last minute decision due to all the whining on the BF forums about how Zvezda or Plastic Soldier Company are so great and that BF should follow suit or those people will continue to buy from other manufacturers. This box has been my greatest disappointment yet. I cannot believe that a company with such excellent customer service would deliberately sell a misrepresented product to its consumers. I expect these shenanigans from other companies but not one like BF. I am deeply saddened by this. In closing I would like to share one last picture that sums up how I feel about the new panther g platoon box despite how wonderful the sculpts are and how easily they went together.
Coming Soon - Spetsnaz platoon (my first fully painted FoW models seen above the AR-15)
And that's when the real problems at least for me started. The tracks. Either they are simply way too wide or the part of the hull that hangs over them isn't wide enough. I didn't know that panther tanks tapered from the back to front either but they sure as hell do on these models.
Notice how at the rear of the tank you cannot see tracks but as you get to the front of the tank near the fenders you can see tracks? One might think this is not a big deal. Well that "one" also probably doesn't want to attach the skirts to their tank either. The skirts should be flush with the hull, not touch the tracks, and should be vertical or ever so slightly angled. The problem with this cast is that you cannot mount the skirts the way they were meant to be mounted without using a hell of a lot of filler putty (that I currently do not have available in my hobby supplies). The alternative is to mount the skirts at an extreme angle like the following.
Those are pics with the skirt sticky tacked on. I will NOT be building my lovely tank like this. How atrocious. Here are a couple of pics of how it should look but with the very obvious gap near the front fender.
I went to BF's website and looked at their web article. Sure enough they have the same tank with the taper in the hull and of course do NOT have the skirts attached because they CAN'T attach them without excessive modification.
I added the straight red lines so you can clearly see what straight is and that their hull tapers at the front leaving the gap. I then noticed on the assembly pictures that they did have one with the skirt attached and you can clearly see a gap at the front near the fender.
I then decided to look at some of their other pics and looked at the box and made what I think is a shocking discovery. They advertised their new panther g tanks right on the box art with their old metal panther parts. I couldn't freaking believe it. Just look at this picture for my evidence.
This is the picture provided on their website and the box. If you look closely where I have made the circles you can see several glaring inconsistencies with the models I have received. First look at the gun barrels. All of the black markings are holes but they are inconsistent with eachother. The new panther kit has plastic barrels so all of the holes should be identical. These are not, so that leads me to believe they are the old metal barrels with the holes individually drilled out. Next look at the hull MG on the bottom right vehicle. It looks nothing like the hull MG I received in my kit which you can see in my pics above. Why? Because it is the old metal hull MG. Next and most importantly look at the right fender area. What do you see? You see no huge gap between the hull and the skirts and that the skirts are mounted vertical the way they should be. Next you can also see that the fender light is thinner at the base and doesn't look like a glob of plastic like the over-simplified plastic fender lights do. What does that mean? It means that the fender is the old metal one and that either the hull is straight the way it should be or the track isn't too wide to interfere with the skirt. Lastly, I forgot to mark it but have a look at the tracks themselves. The details on them are nowhere near as good as the new plastic tracks have. They aren't even in the same book let alone the same page. They are obviously the old metal tracks which are thinner than the new plastic ones.
Based on this information I have deduced that the plastic parts included with the panther g box set must have been a last minute decision due to all the whining on the BF forums about how Zvezda or Plastic Soldier Company are so great and that BF should follow suit or those people will continue to buy from other manufacturers. This box has been my greatest disappointment yet. I cannot believe that a company with such excellent customer service would deliberately sell a misrepresented product to its consumers. I expect these shenanigans from other companies but not one like BF. I am deeply saddened by this. In closing I would like to share one last picture that sums up how I feel about the new panther g platoon box despite how wonderful the sculpts are and how easily they went together.
Coming Soon - Spetsnaz platoon (my first fully painted FoW models seen above the AR-15)
12 June 2012
Instant Mold
My first pack of Instant Mold arrived today and I was more than a little bit giddy to play with this stuff. I have a few bits of stowage that I need a lot of to add some flavor to my very plain IS-1s. The package you get contains six strips of Instant Mold.
I took out one piece to give it a test run and laid out the bits that I wanted to test out duplicating. In this case, three tarps/bedrolls and the stowage that I cut off the rear end of a damaged ISU-122/152 hull (unique sculpt from the platoon box).
Simply place however much Instant Mold you need into hot water for five minutes. I went the quick route and put a few cups of water into the coffee pot without coffee. When it is done, take it out of the water and dab it with a cloth to remove any moisture on it. At this point simply knead it to get it consistent throughout. At this temperature, it is sort of like putty and is extremely easy to manipulate. Once I got the shape I needed, I set it on a flat surface and pressed each of the bits I wanted to duplicate into it. It is worth noting that it also turns clear.
Place the mold in some cold water for a minute to rapid cool it then remove the parts and dry it off. At room to cool temperatures you can no longer manipulate it like putty but it still bends and can easily be cut with a hobby knife if you like. I bent it a little bit and used a knife to pop the parts right out. This is the freshly made empty mold.
It is hard to tell from the picture but the details are every bit as crisp as the parts I put into them. Now I don't have any kneadatite (green stuff) and am not keen on spending $15 a just a little bit of it so I checked out Wal-Mart for some alternatives. The one on the left is steel putty found in the automotive department and the one on the right is plumbers putty found in the bathroom hardware aisle. I think the steel stuff was about $7 and turns a very dark grey when kneaded. The plumbers stuff was $3 and turns light off white.
First I tested out the plumbers putty. Cut off a small slice and mixed it up and pressed it into the mold. As excess material fanned out, I rolled it back onto the area over the cavity and pressed it in. The plumbers putty takes around 15 minutes to get hard enough to touch and twice that time to really set so I went and had a couple of smokes while I waited.
After it finally set I simply gently bended the mold and popped the parts out. I then let them hang out for another hour before cutting the flash off so I wouldn't damage them while manhandling them.
Next was the steel putty. This stuff was a bit of a pain in the ass to deal with. It is EXTREMELY sticky and there were times when the material I had pressed into the mold kept trying to come up with my finger as I pressed it. The steel putty has a very quick set time of five minutes. By the time I got back from my cigarette I could barely make a mark in it with my fingernail.
After letting them both set, I cut off all the excess material and lined them up next to the original parts for comparison.
I must say I am very impressed with this product. I now have more stowage than I will ever need and I got it for dirt cheap. The quality is pretty damn good compared to the originals. The best part about Instant Mold is that you can keep using the mold as much as you want and you can also RE-USE it. Just stick it back in hot water and it turns to putty again. This means you can combine all the sticks you got into a giant mold for bigger stuff (cough tank hull to make a destroyed marker out of cough) or you can recombine bits you may have cut apart into its original form. Another great thing about this product is that as far as I can tell, NOTHING sticks to it. Not even the ultra sticky steel putty left any residue on it that I can see.
Picked Instant Mold up at www.scifigenre.com for $10 and it will save me hundreds.
I took out one piece to give it a test run and laid out the bits that I wanted to test out duplicating. In this case, three tarps/bedrolls and the stowage that I cut off the rear end of a damaged ISU-122/152 hull (unique sculpt from the platoon box).
Simply place however much Instant Mold you need into hot water for five minutes. I went the quick route and put a few cups of water into the coffee pot without coffee. When it is done, take it out of the water and dab it with a cloth to remove any moisture on it. At this point simply knead it to get it consistent throughout. At this temperature, it is sort of like putty and is extremely easy to manipulate. Once I got the shape I needed, I set it on a flat surface and pressed each of the bits I wanted to duplicate into it. It is worth noting that it also turns clear.
Place the mold in some cold water for a minute to rapid cool it then remove the parts and dry it off. At room to cool temperatures you can no longer manipulate it like putty but it still bends and can easily be cut with a hobby knife if you like. I bent it a little bit and used a knife to pop the parts right out. This is the freshly made empty mold.
It is hard to tell from the picture but the details are every bit as crisp as the parts I put into them. Now I don't have any kneadatite (green stuff) and am not keen on spending $15 a just a little bit of it so I checked out Wal-Mart for some alternatives. The one on the left is steel putty found in the automotive department and the one on the right is plumbers putty found in the bathroom hardware aisle. I think the steel stuff was about $7 and turns a very dark grey when kneaded. The plumbers stuff was $3 and turns light off white.
First I tested out the plumbers putty. Cut off a small slice and mixed it up and pressed it into the mold. As excess material fanned out, I rolled it back onto the area over the cavity and pressed it in. The plumbers putty takes around 15 minutes to get hard enough to touch and twice that time to really set so I went and had a couple of smokes while I waited.
After it finally set I simply gently bended the mold and popped the parts out. I then let them hang out for another hour before cutting the flash off so I wouldn't damage them while manhandling them.
Next was the steel putty. This stuff was a bit of a pain in the ass to deal with. It is EXTREMELY sticky and there were times when the material I had pressed into the mold kept trying to come up with my finger as I pressed it. The steel putty has a very quick set time of five minutes. By the time I got back from my cigarette I could barely make a mark in it with my fingernail.
After letting them both set, I cut off all the excess material and lined them up next to the original parts for comparison.
I must say I am very impressed with this product. I now have more stowage than I will ever need and I got it for dirt cheap. The quality is pretty damn good compared to the originals. The best part about Instant Mold is that you can keep using the mold as much as you want and you can also RE-USE it. Just stick it back in hot water and it turns to putty again. This means you can combine all the sticks you got into a giant mold for bigger stuff (cough tank hull to make a destroyed marker out of cough) or you can recombine bits you may have cut apart into its original form. Another great thing about this product is that as far as I can tell, NOTHING sticks to it. Not even the ultra sticky steel putty left any residue on it that I can see.
Picked Instant Mold up at www.scifigenre.com for $10 and it will save me hundreds.
Panther G Platoon Extras
Got my Panther G platoon box today and I absolutely love it. The quality of the plastic parts is exceptional and so so crisp (eat your heart out Plastic Soldier Company). As I was building my first Konigstiger I was dreading the fact that I would have to drill out the sides of the muzzle break. I am inexperienced at this and was worried that I would destroy the barrel like I did one of my IS-3 barrels. But then I noticed that the bits sprue that comes with the new Panthers has an extra 88mm gun that is meant for the Jagdpanther which of course is a tank destroyer that shares the chassis of the Panther. This extra gun happens to be identical to the Konigstiger's gun except for how it is mounted to the hull. This was a no brainer...
I cut each of the barrels of as straight as I could and then used the dremel to get them even. I then glued the upper portion of the extra plastic barrel onto the lower portion of the Konigstiger's metal barrel. This is the result.
I think it is PERFECT! Since the Panther G platoon comes with 5 of these extra barrels, you can easily convert an entire platoon of Konigstigers in this manner. If you're like me and collecting Germans for the eastern front and using Grey Wolf (meaning you can't even take Jagpanthers in your lists) then this is a very nice way to spice up your KTs. Another thing worth noting is that the Panther kit comes with two plastic hull MGs one without zimmerit for the Panthers and one with zimmerit. Other than having a longer MG barrel, the one with zimmerit is identical to the poorly cast metal hull MGs that come with the Konigstigers but is full of crisp detail.
If you havn't already, pick up a box of these Panthers. They are freakin sweet!
(Soviet 80mm mortar teams work in progress in the background)
I cut each of the barrels of as straight as I could and then used the dremel to get them even. I then glued the upper portion of the extra plastic barrel onto the lower portion of the Konigstiger's metal barrel. This is the result.
I think it is PERFECT! Since the Panther G platoon comes with 5 of these extra barrels, you can easily convert an entire platoon of Konigstigers in this manner. If you're like me and collecting Germans for the eastern front and using Grey Wolf (meaning you can't even take Jagpanthers in your lists) then this is a very nice way to spice up your KTs. Another thing worth noting is that the Panther kit comes with two plastic hull MGs one without zimmerit for the Panthers and one with zimmerit. Other than having a longer MG barrel, the one with zimmerit is identical to the poorly cast metal hull MGs that come with the Konigstigers but is full of crisp detail.
If you havn't already, pick up a box of these Panthers. They are freakin sweet!
(Soviet 80mm mortar teams work in progress in the background)
11 June 2012
Toys to Wet My Palette
Went to Michaels today to check out some hobby stuff (I was the only guy there, the place is beaver city) and happened upon a wet palette for $15. So far I've found that while painting the thinned paints congeal and dry out fairly quickly which is irritating. This paint is by no means cheap. Equally irritating is the fact that it comes out drop by drop. Sometimes a single drop is just too much. So I decided to pick up the wet palette as well as an extra sponge and a pack of extra wet palette paper.
This thing is pretty awesome. The wet palette itself is a pretty straight forward box that keeps moisture inside. This is what you get in the package.
When you open it there is wet palette paper and a sponge inside. Now you can make these at home with whatever you've got lying around for cheaper but the beauty of this thing is that it is all self contained and really does work.
You soak the sponge and then wring it out a few times for first use. The paper is extremely durable, washable, and reusable. Simply soak it in hot water for 10 minutes then rinse it in cold water then set it on top of the completely saturated sponge and you're ready to go. Three days after mixing paints on this thing, they are still moist. Simply re-thin them with water and use them up! This item pays for itself after a month if not less than that.
This thing is pretty awesome. The wet palette itself is a pretty straight forward box that keeps moisture inside. This is what you get in the package.
When you open it there is wet palette paper and a sponge inside. Now you can make these at home with whatever you've got lying around for cheaper but the beauty of this thing is that it is all self contained and really does work.
You soak the sponge and then wring it out a few times for first use. The paper is extremely durable, washable, and reusable. Simply soak it in hot water for 10 minutes then rinse it in cold water then set it on top of the completely saturated sponge and you're ready to go. Three days after mixing paints on this thing, they are still moist. Simply re-thin them with water and use them up! This item pays for itself after a month if not less than that.
05 June 2012
IS Hulls on the Block
Five IS-2s and four ISU-122/152s are currently getting built. I just got my first Dremel tool and I must say that it is a close tie with my brushes as the most important tool in my arsenal. It cuts, sands, drills, polishes, buffs, grinds, and performs fellatio. I am absolutely in love with it and this is just the $20 two speed cordless model from Wal-Mart.
I don't have a pin vise or anything like that but despite this I decided it was time to try my hand at drilling out the barrels anyway. I loaded up a 3/64" bit and tested it out on one of the IS-3 barrels I will not be using with my force due to scale desparities. I butchered it. Theres one $10 tank ruined and destined to be an objective marker some day. I steadied my hand and went for the ISU barrels first since they don't have muzzle breaks. Mission accomplished and they look good. I attempted one of my IS-2 barrels and I think it turned out alright. Wish I had a file set tiny enough to square it up but I think at such a small scale it will look fine once painted.
I have some people who know nothing of the hobby so am including a picture of one of my built IS-2 tanks next to a nickle for size reference.
Finally, the only completed models I have so far are a couple of casualty markers I got with my Russians. When I started painting them, I assumed they were dead Russians since they came in Russian boxes. These are in fact German models as can easily be seen by the lip on the helmet and the various German gear on their backs. I think they still look ok. Seen here with a nickle for size reference. I would like to note that everything I paint is done so with a very shakey hand, inadequate lighting, by hand, and by brush. I do not own an airbrush which is going to be a problem for the Germans I have on the way (new box of the Panther G inbound). I think they will end up being painted in basic German Grey.
Until next time!
I don't have a pin vise or anything like that but despite this I decided it was time to try my hand at drilling out the barrels anyway. I loaded up a 3/64" bit and tested it out on one of the IS-3 barrels I will not be using with my force due to scale desparities. I butchered it. Theres one $10 tank ruined and destined to be an objective marker some day. I steadied my hand and went for the ISU barrels first since they don't have muzzle breaks. Mission accomplished and they look good. I attempted one of my IS-2 barrels and I think it turned out alright. Wish I had a file set tiny enough to square it up but I think at such a small scale it will look fine once painted.
I have some people who know nothing of the hobby so am including a picture of one of my built IS-2 tanks next to a nickle for size reference.
Finally, the only completed models I have so far are a couple of casualty markers I got with my Russians. When I started painting them, I assumed they were dead Russians since they came in Russian boxes. These are in fact German models as can easily be seen by the lip on the helmet and the various German gear on their backs. I think they still look ok. Seen here with a nickle for size reference. I would like to note that everything I paint is done so with a very shakey hand, inadequate lighting, by hand, and by brush. I do not own an airbrush which is going to be a problem for the Germans I have on the way (new box of the Panther G inbound). I think they will end up being painted in basic German Grey.
Until next time!
03 June 2012
Camo Pattern Testing
I am still in the testing phase of what camo pattern I will be using on my AFVs and possibly my larger artillery and AA pieces. I first did a standard Russian Green camo scheme to see how easy it was and so far that is hands down the easiest to paint. It goes so quickly and the dark green is very easy to work with. I posted a thread on Battlefront's forums a couple of months ago with my prototype camo scheme and receieved some criticism that the tan was too bright and that the red was too bright and too red. I agreed. The scheme I am trying to replicate is the tri color Caucasus scheme of tan, dark red, and dark green. I first found out about this camo in World of Tanks and use it on all of my Russian tanks in that game.
Since creating that thread on Battlefront's forums, two other people have posted pics of their completed miniatures in this exact same camo so I am obviously not the only one in love with it. Unfortunately for me, I am still TESTING the camo since this is my first time working with models that are so tiny and I am still trying to get the colors just right. So far the comments on their threads are "nice to see Russians in a color other than green for once". I feel I have missed my shot at glory because by the time I get my stuff done in this scheme it will have become the new "ho-hum green".
At any rate, I have completed the 2nd prototype a few minutes ago so here are the pics I've got. I have painted no details. I am just trying to get the camo right. Prototype One is on the right and uses Vallejo Bone White, Vallejo Gore Red, and Vallejo Russian Green. The right side of Prototype One is washed in black and the left side is washed in brown. At the suggestions of people on the forums, I opted for the black wash as can be seen on the entirety of Prototype Two. Also at the suggestion of people in the forums, I have selected a darker and more yellowish tan and a darker but less red red in the form of Vallejo Beige and Vallejo Hull Red. The model on the left is my newest approximation of the camo scheme above. Hope I got it right.
Since creating that thread on Battlefront's forums, two other people have posted pics of their completed miniatures in this exact same camo so I am obviously not the only one in love with it. Unfortunately for me, I am still TESTING the camo since this is my first time working with models that are so tiny and I am still trying to get the colors just right. So far the comments on their threads are "nice to see Russians in a color other than green for once". I feel I have missed my shot at glory because by the time I get my stuff done in this scheme it will have become the new "ho-hum green".
At any rate, I have completed the 2nd prototype a few minutes ago so here are the pics I've got. I have painted no details. I am just trying to get the camo right. Prototype One is on the right and uses Vallejo Bone White, Vallejo Gore Red, and Vallejo Russian Green. The right side of Prototype One is washed in black and the left side is washed in brown. At the suggestions of people on the forums, I opted for the black wash as can be seen on the entirety of Prototype Two. Also at the suggestion of people in the forums, I have selected a darker and more yellowish tan and a darker but less red red in the form of Vallejo Beige and Vallejo Hull Red. The model on the left is my newest approximation of the camo scheme above. Hope I got it right.
Subscribe to:
Posts (Atom)