Showing posts with label Modeling. Show all posts

29 October 2013

Nemmera ARV Conversions

I've finished most if not all of the work on my Nemmera armored recovery vehicles. These vehicles do exist today but I think they are in prototype stages. They are based on the Merkava MkIII chassis. Here are a few of the best (and only) pics I can find of the actual vehicle.

The crane.


The spare power pack on top. This is the only photo I have ever seen that shows the power pack clearly.


The rear end.


The rear end in action.


And here are the vehicles I created with a Merkava so you can see the start to finish. Green parts were made by me using green stuff putty. White parts are drywall putty. Off-white parts such as the power pack and hatch on top were cast and then parts made from Steel Putty from Walmart (see previous post in 2012 for info on those products). And silver parts are GHQ products. The hull is the Merkava MkIV and the crane and winches are from the AARV-7 Command/Engineer pack from the US line.


16 October 2013

IDF Merkava ABVs

The Merkava armored bridge layers are finished. The conversion went so smoothly that I managed to create both vehicles nearly identically and I could probably do it again and again and again if I wanted to. I think I'm going to need to order another pack of the M104 Wolverines just for the bridge part so I can have them in the extended position and put a phyical model on the table where the bridge is placed.

I pretty much gutted the Wolverines. I cut off any generator looking box thingies off the top of them, the command cuppola/hatch, and the shovel doohickey thingamabob off the front. I think these turned out great and will look fantastic alongside my Merkavas. Who needs M60 ABVs anyway?


I'm working on the ARVs now which I decided to do on Merkava chassis. I'm going to have like 10 spare Merkava IV turrets lying around after all of this is done.

Kitbashing Ultra-Moderns

So with the date of my fictional Israeli/Iranian/Syrian/Egyptian war pushed back to the early 2020s, I now have the opportunity to be somewhat creative with my armies while still retaining roots in modern reality. What I mean is that now my armies have had an extra decade to field more cutting edge equipment possibly narrowing the technological gap between the forces which I think will create a more balanced and fun battle.

First up are a couple of Merkava variants. This first variant is one that existed in the past as a prototype but was axed due to costs. It was the Sholef self propelled howitzer. The vehicle was basically an early Merkava chassis with an early M109 (a1?) turret mounted on it in essence giving the Israelis an M109 artillery piece with the armor of a main battle tank.


This kitbash is stupidly easy for my ultra modern Israeli army. US M109a6 + IDF Merkava MkIV = IDF Sholef MkII.


Next up I thought that by the early 20s that the Israelis would have a modernized bridgelayer that was able to take a beating. Drawing inspiration from the American bridgelayer, the M104 Wolverine, which is built on an M1 chassis, this kitbash was also a no brainer.

US M104 Wolverine + IDF Merkava MkIV = IDF Merkava Bridgelayer (researched name forthcoming).


Now onward to the Namer variants. Right now the Namer exists as a HAPC which is armed with a 12.7mm HMG mounted in a remotely controlled turret and a 7.62mm or 5.56mm LMG manually controlled from the cupola next to it. It can be upgraded to carry an automatic 40mm grenade launcher in the turret but this still hardly makes it an IFV. Possible variants to the Namer that are being planned are an IFV version with a 30mm automatic cannon and Spike ATGM launcher, a MedEvac, Command vehicle, and an ARV.

The first of these kitbashes I am showing is the ARV. Now I wasn't sure what I wanted to use for a crane so I ended up buying two kits for it and chose which I liked best. The US truck with the wrecker arm was good but the AAVR-7 A1 looked closer to pictures I had seen. I have not completely decided yet whether this kitbash will be done with the Merkava or the Namer chassis. Even though the Namer is basically a Merkava chassis, they are quite different especially in size.


US AAVR-7 A1 + IDF Namer = IDF Namer ARV (researched name forthcoming).


Finally is the Namer HIFV. Because I have no idea what the turret would look like I had several options here. I saw what a couple of the turrets that are possible looked like and they occupy the automatic turret spot, stick up really high and look funky like the turrets on the older Achzarit IFVs. The benefit to this type of turret is that the passenger compliment remains at 12 fully armed soldiers. The downside is that the turret doesn't look anywhere near as beefy or armored as the rest of the vehicle. From an aesthetics standpoint, this really bothered me so I instead started looking at "proper" turrets that I could steal from other vehicles. First I looked at the M2 Bradleys. I decided that if I would use a turret like these that it would be only fair to reduce the passenger capacity by at least 2 men to 10. The Bradley can hold 8 but since the Namer is so much larger I felt that 10 would be fine especially seeing as how it only has a crew of 2, driver and a gunner. But the Bradley turret seemed to iconic and American to stick onto an Israeli hull. Then the newest IFV by GHQ immediately popped into my head, the German Puma IFV. After looking at the pictures I was immediately sold. The Puma is armed with a really cool looking futuristic 30mm autocannon and Spike ATGM missiles which is already what the Israelis use anyway. I stuck the turret onto the Namer and that cemented my decision. Some people will bash me for the liberal nature of this design but I really think it fits well with modern IDF armor and it has the exact weapons the Israelis are planning for.

Please note that the Puma turret is just resting on the Namer and so looks funky and isn't positioned exactly where it will be. I have to cut off a hatch. It will be in a similar position on the Namer as it is on the Puma.

GER Puma IFV + IDF Namer HAPC = IDF Namer HIFV (researched name forthcoming).


These are just quick and dirty pictures to show off my ideas for my ultra moderns. There will be a little bit more to the conversions that this. For instance on the ARV mods I will be cutting off the little winches and such and using those on the vehicle as well. I may also end up screwing around with some modeling putty again.

Keep an eye out because I really hope to start showing off some completed work of both my 1/285 IDF and my 1/2400 USN soon. So much to do and so little time to do it in.

14 October 2013

Micronauts Test Base

I slapped some drywall putty down and got a test base finished. I need to research (look at pictures of ships for ten hours straight) more so I can get the wake and divergent waves just right. I have too many waves coming off the bow and they aren't angled properly. Not bad for the first one but I'm just not happy with it. Will throw this one away because I know the next one will be a lot better. Once I get my technique down I can start mass assembly lining them.

Finished base with a single gloss coat. Dark Prussian Blue base highlighted with Dark Blue and then drybrushed with white. I might experiment with some greens but we'll see how it goes. The Dark Prussian Blue is an absolutely rich and gorgeous color. This particular base was made specifically for an Atlanta Class cruiser.


An Atlanta Class Cruiser on the base.


Without flash.


What I really love about actually modeling the waves on is that when viewed from the side there is actual depth which obstructs parts of the hull making it really look like it is a ship in water.


I will take pictures during the creation of the next base as I go and post up a step by step tutorial for anyone that will find it useful. Peace!

11 October 2013

All aBOARD

I have ships. Lots of ships. I think over 30 of GHQ's absolutely fantastic 1:2400 scale WWII era United States Navy ships. So far I have the following,

Carriers
-Yorktown Class
--CV-6 USS Enterprise
-Essex Class
--CV-10 USS Yorktown
-Sangamon Class
--CVE-26 USS Sangamon
-Casablanca Class
--CVE-73 USS Gambier Bay
Battleships
-Montana Class
--BB-67 USS Montana
-Iowa Class
--BB-61 USS Iowa
-South Dakota Class
--BB-60 USS Alabama
--BB-59 USS Massachusettes
Battlecruisers
-Alaska Class
--CB-1 USS Alaska
Heavy Cruisers
-Baltimore Class
--CA-69 USS Boston
--CA-70 USS Canberra
Light Cruisers
-Cleveland Class
--CL-56 USS Columbia
--CL-57 USS Montpelier
-Atlanta Class
--CL-53 USS San Diego
--CL-54 USS San Juan
--CL-96 USS Reno
--CL-97 USS Flint
-Omaha Class
--CL-8 USS Detroit
Destroyers
-x3 Sumner Class
-x9 Fletcher Class
-x3 Farragut Class
Destroyer Escorts
-x3 Butler Class
-x9 Bagley Class
And a whole crapload of aircraft.

Anyway that's a lot of stuff that needs painting and after building a few of the ships and seeing how stupidly tiny some of the details and guns are, I've decided that I want to base them. I did some measuring and came up with the following sizes I want for my ships. All sizes are in inches.

Fighters (2 per base) - 0.75 x 0.75
Bombers (1 per base) - 1 x 1
Torpedo Boats (4 per base) -
Motor Torpedo Boat -
Submarine -
Destroyer Escort - 2.25 x 0.75
Destroyer - 2.75 x 0.75
Light Cruiser - 3.5 x 1
Heavy Cruiser - 4.25 x 1
Battlecruiser - 4.75 x 1.25
Battleship -
Battleship (Iowa) - 5.25 x 1.25
Escort Carrier -
Fleet Carrier - 5.5 x 1.5

Ok so now that I had sizes I went and did some price checking. I found a website called http://bayareayards.virtualscratchbuilder.com/ that has some pretty damn sweet bases made specifically for GHQ ships. They're made out of resin and each base is sculpted to fit a specific hull. They're pretty nice but then I saw the price and immediately closed the site. Over $3 just to put a base on my Montana? No thank you kind sirs. People have at times asked me why I go so cheap on supplies and such when I buy such expensive models. One short answer is the cheap stuff usually works just as well as the expensive stuff. Another short answer is that I spent so much money on the models that I no longer have much money for supplies. Anyway I headed off to http://www.litko.net/ to use their base maker utility and get these things priced out. One thing I found interesting was that 1.5mm acrylic bases were $1 per package cheaper than the same sized bases in 1.5mm thick plywood. At any rate I was looking at $100 for acrylic bases and $115 for plywood ones. No thank you kind sirs.

Hours and hours of research and failed ideas later it hit me like a ton of bricks. Matboard. That stuff that they put in picture frames. That's matboard. It's not too thick and not too thin and I remembered it being fairly sturdy. Headed off to Hobby Lobby but couldnt find any matboard that I wanted but ended up seeing some artist board that looked perfect. I picked up a 3 pack of Canson artist board in just about 10"x8" sheets for $8 bucks. Pro tip at Hobby Lobby if you want to save money. Whip out your smartphone at the store and go to www.hobbylobby.com and under the graphic click on the coupon button. Show that to the cashier and get the discount for ANY one item you're buying at regular price. You can use that coupon for one item once a day. Right now it's 40% off and last week I got my mom a $200 painting for $120 by using that coupon.

Moving on, this is what the artist board looks like.


I then marked out the base sizes and labeled them. DD for destroyer, DE for destroyer escort, CA for heavy cruiser, and CL for light cruiser. No left handed person's art project is complete without ink smudging.


On the first sheet I cut everything by hand using an exacto knife and a metal ruler. It took hours and my fingers were numb by the end of it. What's worse, they looked like shit. The blade is thin so everything was beveled in different directions. Sizes were off by a lot at times and the multiple cuts it takes to cut through the sheets showed through on the sides.


Atrocious. These were unacceptable and I had to figure out how to get them done right. In another moment of genius I remembered a big ass paper cutter I had.


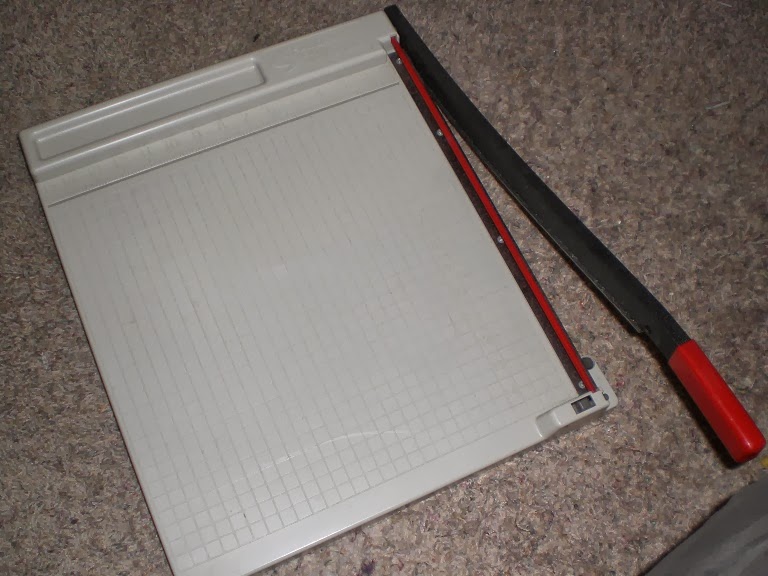
Surely this beast would be able to cut through the artist board?


And cut through it it did. 15 minutes later I had 2 CL bases, 2 CA bases, 14 DE bases, 16 DD bases, and 2 fighter aircraft bases plus just a little bit of waste material. What's even better is that the variation in the sizes is 1mm or less which isn't anything to complain about. If you want better then get a laser cutter or buy laser cut bases which obviously defeats the whole purpose of making $100 worth of bases for $8. I will be using drywall putty to make waves on them before mounting the ships.


Ship pictures to come in the future. I also have more Israelis on the way for some fun and easy projects such as the Sholef self propelled artillery conversion, Namer AIFV conversion,  and Merkava conversions into ARV and bridgelaying variants! FUN!

27 July 2013

Project Nearing Termination!

So freaking excited right now. Today was a long day of working on this thing, drinking lots of dew, and smoking lots of cigarettes.

Pulled everything I sculpted off the aircraft and glued it all in place.
More detail sanding.
Attached remaining payload.
Hand made second drop tank since my duplication attempts proved unsuccessful.
Glued the pylons I stole from the Mk82 clusters onto the drop tanks.
Glued the drop tanks in.
Cut and filed a couple of nails to use as the Amraam-120s.
Moved the AIM-9s under the wing next to the GBU-16s.

I love it! It could be so so much better especially if GHQ would just make modern F-16s or at the very least, make a modernizing kit people could buy for their current F-16 model but as I've stated, this was my first ever attempt at sculpting and now that the payload is completely on this thing looks FIERCE. Ready to kick some Hezbollah ass.


No Sleep Til Sufa

This is one of the few instances where I am happy that I have not been able to find full time work around here. This thing has absolutely consumed every waking hour over the last few days. I have learned a trick to speed things up though. I read on the packaging for my kneadatite that if you have it under a warm lamp it speeds up the curing process and if you freeze it it stops the curing process. So now any time I make something and don't feel like waiting, I toss the model and or part I made into the toaster oven, set it to convection, and have the temperature setting set to about 100°F to 120°F. After 10-20 minutes in the toaster oven, the part is ready to be sanded, cut, drilled, fed to my cat, whatever and since the melting point of pewter is around 450°F there is no chance of anything melting. I would obviously not recommend this for plastic miniatures since even a lamp gets hot enough to melt it but this is a non-issue for me since everything GHQ makes is pewter or whatever white metals they use.

Anyway I did some more fine sanding to the plane and trimmed up the nose part just a little bit. I stuck on the AIM-9 missiles and the GBU-16 LGBs and that's when I realized that trying to fit a pair of Amraam-120s in might be folley. GHQs ordnance is kind of chunky so there isn't much space under the wings to fit the 4th hardpoint. Unfortunate but I might just have to scrap the idea of adding Amraam-120s or HARMs to this model.

The ordnance also comes with some Mk82 dumb bombs in clusters of 3. I had no intention of using these so I cut the bombs off of the pylon in order to use the pylon to attach  the drop tanks. As I tossed the scrap metal aside I realized that I had cut off one perfect bomb from each pylon. I had a eureka moment and realized that these would be useful. I cut the tails off and glued them to either side of the engine intake. BAM. Instant optics. TAG and whatever the other one is. Looks pretty cool if you ask me.

On to the drop tanks themselves! I took more scrap metal and glued two nails to it. I then coated the nails in the lubricant I've been using, grapeseed oil I happened to have already for cooking, and then I stuck kneadatite on them. I coated my fingers in oil and gently massaged the putty into the shape I needed. After baking the drop tanks for 20 minutes they were ready to be sanded. One turned out perfectly. The other looked like it had been hit by a bus. I pitched the shitty one and did some fine sanding on the good one which you can see in the pics below. Rather than attempt to make another perfect one, I think I am going to make a mold of it and cast two drop tanks from the mold instead. I havn't decided whether I will cast them in kneadatite or two part casting resin but both are an option for me. In retrospect maybe I should have made molds of all the parts I made for this plane? I doubt I'll ever want to make another one again unless I had the parts readily available.


26 July 2013

CFT v2.0

Woke up today and realized that while the CFT I sculpted last night looked pretty damn cool, it was extremely exaggerated and shaped completely wrong and I hated it for that. I pulled it off the jet and took this opportunity to do some sanding on the dorsal spine to thin it up just a bit.

After studying about 50 different pictures of F-16Is I went ahead and did the easier part of the project and sculpted the nose a little bit. The GHQ model is pretty much flat on the underside but the F-16Is nose is rounded below the wing and this rounded area extends back a bit behind the engine intake. It looks a little too beefy so I might end up sanding it down a little bit more.

I then did some practice sculpting with clay to try and get a feel for how I wanted the CFTs to look. After an hour or so of that I started doing the actual sculpting. It took me about 3 hours to get the first one right and then another 2-3 hours to get the second one to match the first one. This was an absolute headache. I don't know how people out there sculpt this kind of stuff but I guess practice makes perfect and they sure seem to have a shit ton of practice.

The model is far from the perfection I had envisioned for it and it isn't quite symetrical but this is going to have to do. I am at the limit of my abilities to do any better than this. I already have probably 20+ hours invested in this thing and I still have another 2-5 hours to go I think before I can even get the primer on.

Up next is the 600 gallon drop tanks. Attach the AIM-9 missiles. Attach the LGBs. Maybe attach a center drop tank and a targeting pod for the LGBs. And maybe modify the model to go from 3 hardpoints per wing to 4 hardpoints per wing in order to accomodate a pair of amraam-120 missiles.


25 July 2013

F-16I Sufa CFT Attempt

Got the first CFT sculpted onto the F-16I. The shape is nowhere near perfect but then nothing I've sculpted on this model so far is. It's such a small scale to get just right. Will have more pics tomorrow when I finish the other CFT, the nose, and the pylon mounted drop tanks.


01 July 2012

Final Solution to the Panther G Question

Well anyone that has been following the Panther G drama knows that I have been whining and crying like a little girl about the one thing about them that I didn't like, the skirts not being able to be attached. For me, it was a huge enough issue to ruin the entire set because the only reason I bought them was to have panthers WITH skirts and NO zimmerit. Anyway, I have created a tutorial to show you how to get them to look good with the skirts. The first tank took me maybe 3 or 4 hours to do but this second one I did for the tutorial maybe took me an hour and a half. Beware, this tutorial is long winded and thorough.

First you will need a Panther G, a super sharp hobby blade, some filler, super glue, and some patience. I have converted many things in the past but I am what I would consider a barely competent modeler so care needs to be taken in this tutorial or you will stab yourself and bleed everywhere. I can in no way be held responsible for anyone injuring themselves while using this tutorial.


I would not trust your standard hobby blade. I went to Walmart and in the arts and crafts section for a couple of bucks they had these special blahblahadmium coated blades that are supposed to stay sharper longer. I tried them out and not only do they stay sharper longer, they are SHARPER. I accidentally dropped one while sitting down and it stuck into my thigh! Don't you stick that knife in your leg Ricky Bobby.


Now it would be better if you didn't put your tank together. If, like me, you were one of the first people to get these, then you already put them together and must now rip the tracks off. Do that now. Don't worry if you break the backing on the tracks but worry if you break any part of the tank so be gentle and increase force until it gives way.


Again, if you are working with an unassembled tank, skip this step. If you had to rip your tracks off go ahead and scrape the superglue off the hull or use a dremel to grind it off. The flatter the better.


Now take your tracks and lay them so the outside is facing you. Take your hobby knife and carefully score the backing by gently pulling the knife along the top of the tracks. Keep doing this adding more and more force each pass until the upper backing has been trimmed off.


You should now end up with tracks that look like this.


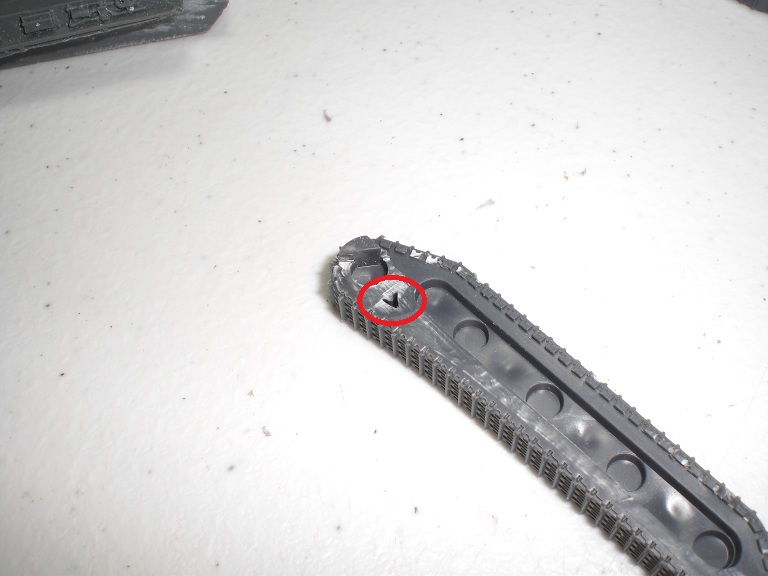
Now we are going to remove the rest of the backing. First you will need to locate the nub at the front of the track. This little nub is all that will remain on the tracks to help you align them correctly on the hull so it is imperative that the nub remains intact. Take your knife and gently push down next to the nub to cut into the track backing. The cut should be as deep as the backing.


Next stand the track up so you are looking at it from above. You can clearly see a mini trench running in between the backing and the track you want to keep. As with the other part of the backing above, gently drag your knife along the plane you wish to cut to score it, using the tracks as a straight edge reference. I have marked it in red. Do this along the entire track but DO NOT cut off the nub.


Repeatedly drag the knife along applying more and more force until the backing begins to give way. As you get closer to the nub at the front of the tracks it would be smart to be much more careful and gentle about what you are cutting away.


At this point I have removed the vast majority of the backing but observe how the nub is still intact! When you get close to the nub it is best to use your thumb to push the blade into the material you want to remove and to remove less material at a time. By doing this, you maintain perfect control of your blade and will not cut off the nub or turn your finger into a nub in the process. Notice my nub is intact but there is quite a bit of backing left around it. That part comes next.


Okay now you will take your knife and push it with your thumb along the backside of the track to remove material and get it to be flat and level. The flatter and more level you can get it, the better the track will attach to the hull later. Just be sure not to remove too much material and ruin your track.


Notice how at this point I am shaving off material rather than really cutting or gouging it off. This is the detail portion of the conversion.


Near the nub you are going to want to shave off enough material until a hole appears. This hole will appear between two road wheels on the outside face. When the hole appears, you have completely removed the backing here and are guaranteeing a flush fit to the hull.


If you look at your track from above you may be able to see some imperfections still. At this point take a hobby file, a dremel tool, or fine grit sand paper and smooth the surface down to get it as flat as you can.


The track is now ready to glue to the tank. Here is the before and after of the left track.


Do a dry fit to the hull to make sure the track is not visible from above the tank at the rear. The tracks will stick out at the front and be visible because the skirt brackets on these pre-remastered hulls are deformed, hence why we have to go through all this.


Now glue the tracks on but keep in mind that because you removed the backing, the track will not have only one way to fit on. Align the nub with the nose of the tank as normal but at the rear of the tank you will have to manually provide a gap between the top of the track and the bottom of the hull.


As long as the hull looks about parallel with the flat bottom of the track the tank will come out looking good and not look as though it is tilted forward or backward. After I glue the tracks on, I like to flood the bottom with superglue just to be sure. Since you removed a hell of a lot of the material used to glue the tracks on, I regard this step as a necessary evil to prevent breakage in the future.


Next glue on your fenders.


Since I am gluing on my skirts prior to painting, I like to prime the bare parts that will be hidden with thinned Vallejo Black. I would advise puting the skirts on now since you may ruin your paint job if you attach them later, or at least need to redo some of it.


NOW GLUE YOUR SKIRTS ON!! We're almost done and now you can start to reap some of the benefits. Glue the skirts on so they are flush with the rear end of the skirt bracket. This will cause part of the skirt to be glued directly onto the fender. This is good because not only will this strengthen the fender in the long run but also provides the frontal contact point for gluing so that the skirt remains stable during the next steps. Note how gluing the front to the fender also creates the gap I bitched so much about. This is good. Before our modifications it was the tracks creating the gap. Now, the fenders properly cover the tracks.


Next grab whatever you have for filler be it hobby putty, green stuff, contour putty, or whatever. I don't have access to hobby stores so I use Walmart for most of my hobby stuff and don't pay the markup you may pay for "specialized" hobby products. Many hobby products are simply common cheap products that have been rebranded for hobbyist use. I am using a $3 tub of drywall spackling.


Using whatever you feel like, apply your filler into the gap. Make sure you put enough in to span the gap and maybe go down into the gap just a tiny bit to ensure there is enough material there. Take care to not get too much of the stuff on other parts of the tank because you will have to scrape it off next.


Now use a knife or something to scrape off the excess filler. I did this after letting it dry for about 10 minutes. In that time it is still soft but not brittle so I can remove excess without chunking some out of the gap. If using a knife I like did to scrape, hold the blade perpendicular to the track so that you aren't accidentally cutting anything off.


Next I like to put superglue on the filler after it has dried for maybe 20-30 minutes. You can skip this part if you like but it has two purposes. First it seals the filler and makes it rock hard. Second it creates a nice smooth flat surface not too unlike the surrounding resin which makes the repair look more natural. If you're unsure about this, try it out on something else and you'll see what I mean.


YOU'RE DONE! Finish up the build by gluing the rest of the tank together and attaching whatever bitz and gubbinz you feel like sticking onto it.


After priming, this is what my first tank looks like. I hope someone finds this information useful and I hope Battlefront learns their lesson. I realize this is a total pain in the ass but at least you can salvage this kit.


Thanks for looking!