Showing posts with label 6mm. Show all posts

29 October 2013

Nemmera ARV Conversions

I've finished most if not all of the work on my Nemmera armored recovery vehicles. These vehicles do exist today but I think they are in prototype stages. They are based on the Merkava MkIII chassis. Here are a few of the best (and only) pics I can find of the actual vehicle.

The crane.


The spare power pack on top. This is the only photo I have ever seen that shows the power pack clearly.


The rear end.


The rear end in action.


And here are the vehicles I created with a Merkava so you can see the start to finish. Green parts were made by me using green stuff putty. White parts are drywall putty. Off-white parts such as the power pack and hatch on top were cast and then parts made from Steel Putty from Walmart (see previous post in 2012 for info on those products). And silver parts are GHQ products. The hull is the Merkava MkIV and the crane and winches are from the AARV-7 Command/Engineer pack from the US line.


25 October 2013

Test Job - GHQ Micro Armour 1/285 Israeli Merkava Mk IV

Just finished a Merkava but it looks completely bland. Not sure what else to do to it to make it more exciting to look at.


F-16I Sufa version 11teen.1octember.toomuchpaintonthisthing.326 FINAL

NO MORE SUFA. It's done done. Like DONE done. Really sick and tired of repainting it trying to get colors down just right.

I took the neon green and whitened it to very close to the pastel green used on the actual aircraft.

I took the tan and used Vallejo Buff which is nice and light but nowhere near as yellow as whatever color I used before.

I took the brown and used Vallejo Flat Earth from their panzer color line which is a lighter brown than before but more importantly has a red tint to it. This change right here is what really tied the whole aircraft's paint scheme together. And here I was worrying about the green the whole time.

I changed the canopy colors to what looks like a more realistic scheme to me. I took dark blue and gently wet/drybrushed blue onto the raised areas and then glossed it. I also changed the color of the canopy lines from black to dark grey so they didn't blend in as well.

Finally, I painted over the IAF roundels and put new larger decals on which really makes the model pop.


16 October 2013

IDF Merkava ABVs

The Merkava armored bridge layers are finished. The conversion went so smoothly that I managed to create both vehicles nearly identically and I could probably do it again and again and again if I wanted to. I think I'm going to need to order another pack of the M104 Wolverines just for the bridge part so I can have them in the extended position and put a phyical model on the table where the bridge is placed.

I pretty much gutted the Wolverines. I cut off any generator looking box thingies off the top of them, the command cuppola/hatch, and the shovel doohickey thingamabob off the front. I think these turned out great and will look fantastic alongside my Merkavas. Who needs M60 ABVs anyway?


I'm working on the ARVs now which I decided to do on Merkava chassis. I'm going to have like 10 spare Merkava IV turrets lying around after all of this is done.

Kitbashing Ultra-Moderns

So with the date of my fictional Israeli/Iranian/Syrian/Egyptian war pushed back to the early 2020s, I now have the opportunity to be somewhat creative with my armies while still retaining roots in modern reality. What I mean is that now my armies have had an extra decade to field more cutting edge equipment possibly narrowing the technological gap between the forces which I think will create a more balanced and fun battle.

First up are a couple of Merkava variants. This first variant is one that existed in the past as a prototype but was axed due to costs. It was the Sholef self propelled howitzer. The vehicle was basically an early Merkava chassis with an early M109 (a1?) turret mounted on it in essence giving the Israelis an M109 artillery piece with the armor of a main battle tank.


This kitbash is stupidly easy for my ultra modern Israeli army. US M109a6 + IDF Merkava MkIV = IDF Sholef MkII.


Next up I thought that by the early 20s that the Israelis would have a modernized bridgelayer that was able to take a beating. Drawing inspiration from the American bridgelayer, the M104 Wolverine, which is built on an M1 chassis, this kitbash was also a no brainer.

US M104 Wolverine + IDF Merkava MkIV = IDF Merkava Bridgelayer (researched name forthcoming).


Now onward to the Namer variants. Right now the Namer exists as a HAPC which is armed with a 12.7mm HMG mounted in a remotely controlled turret and a 7.62mm or 5.56mm LMG manually controlled from the cupola next to it. It can be upgraded to carry an automatic 40mm grenade launcher in the turret but this still hardly makes it an IFV. Possible variants to the Namer that are being planned are an IFV version with a 30mm automatic cannon and Spike ATGM launcher, a MedEvac, Command vehicle, and an ARV.

The first of these kitbashes I am showing is the ARV. Now I wasn't sure what I wanted to use for a crane so I ended up buying two kits for it and chose which I liked best. The US truck with the wrecker arm was good but the AAVR-7 A1 looked closer to pictures I had seen. I have not completely decided yet whether this kitbash will be done with the Merkava or the Namer chassis. Even though the Namer is basically a Merkava chassis, they are quite different especially in size.


US AAVR-7 A1 + IDF Namer = IDF Namer ARV (researched name forthcoming).


Finally is the Namer HIFV. Because I have no idea what the turret would look like I had several options here. I saw what a couple of the turrets that are possible looked like and they occupy the automatic turret spot, stick up really high and look funky like the turrets on the older Achzarit IFVs. The benefit to this type of turret is that the passenger compliment remains at 12 fully armed soldiers. The downside is that the turret doesn't look anywhere near as beefy or armored as the rest of the vehicle. From an aesthetics standpoint, this really bothered me so I instead started looking at "proper" turrets that I could steal from other vehicles. First I looked at the M2 Bradleys. I decided that if I would use a turret like these that it would be only fair to reduce the passenger capacity by at least 2 men to 10. The Bradley can hold 8 but since the Namer is so much larger I felt that 10 would be fine especially seeing as how it only has a crew of 2, driver and a gunner. But the Bradley turret seemed to iconic and American to stick onto an Israeli hull. Then the newest IFV by GHQ immediately popped into my head, the German Puma IFV. After looking at the pictures I was immediately sold. The Puma is armed with a really cool looking futuristic 30mm autocannon and Spike ATGM missiles which is already what the Israelis use anyway. I stuck the turret onto the Namer and that cemented my decision. Some people will bash me for the liberal nature of this design but I really think it fits well with modern IDF armor and it has the exact weapons the Israelis are planning for.

Please note that the Puma turret is just resting on the Namer and so looks funky and isn't positioned exactly where it will be. I have to cut off a hatch. It will be in a similar position on the Namer as it is on the Puma.

GER Puma IFV + IDF Namer HAPC = IDF Namer HIFV (researched name forthcoming).


These are just quick and dirty pictures to show off my ideas for my ultra moderns. There will be a little bit more to the conversions that this. For instance on the ARV mods I will be cutting off the little winches and such and using those on the vehicle as well. I may also end up screwing around with some modeling putty again.

Keep an eye out because I really hope to start showing off some completed work of both my 1/285 IDF and my 1/2400 USN soon. So much to do and so little time to do it in.

Product Review - 1/300 F Toys C-130

I've been keeping an eye out for a C-130 for some time now. You can get one in 1/300 at http://www.armamentsinminiature.com/ for the great price of $12 but as with my previous review of their aircraft, the model will be devoid of any panel lines or cockpit or any real detail at all. You are expected to paint those details in yourself. I ended up finding some nice Russian planes on Ebay in 1/288 scale but it was nothing I could use for my Iranians or Syrians. Finally I found some C-130s by F Toys. I bought one from this guy and he has one left here http://www.ebay.com/itm/F-toys-1-300-Famous-Wing-Collection-Vol-2-C-130-Hercules-Blue-Angels-1C-/121099967563?pt=Diecast_Vehicles&hash=item1c321edc4b. Obviously that link won't be valid for long and I am seriously considering buying another one just to make an AC-130 Spectre Gunship out of it.

Anyway I got one like that as they have several colors available. With some searching you can find other "flavor" aircraft you may want including civilian aircraft to populate an airport map. 1/300 DC-10 http://www.ebay.com/itm/Hobby-Craft-1-300-McDonnell-Douglas-DC-10-CP-Canadian-Pacific-Airliner-/330693141813?pt=Model_Kit_US&hash=item4cfed8e535 and here is a E767 AWACS http://www.ebay.com/itm/Doyusha-400333-E767-Awacs-1-300-Scale-Plastic-Kit-/320756539329?pt=Model_Kit_US&hash=item4aae945fc1 I mean who DOESN'T want an AWACS?

Here is the box I got. I couldn't read a lot of the words because it is in French language.


And here is the back of the box showing several other aircraft they make in this line. Again, much of it is in Spanish.


Here is the instruction booklet. Couldn't read any instructions because it is in Russian language but thankfully pictures transcend all language barriers. Honestly though you don't need instructions. The model is a snap tight model that I only glued to be permanent.


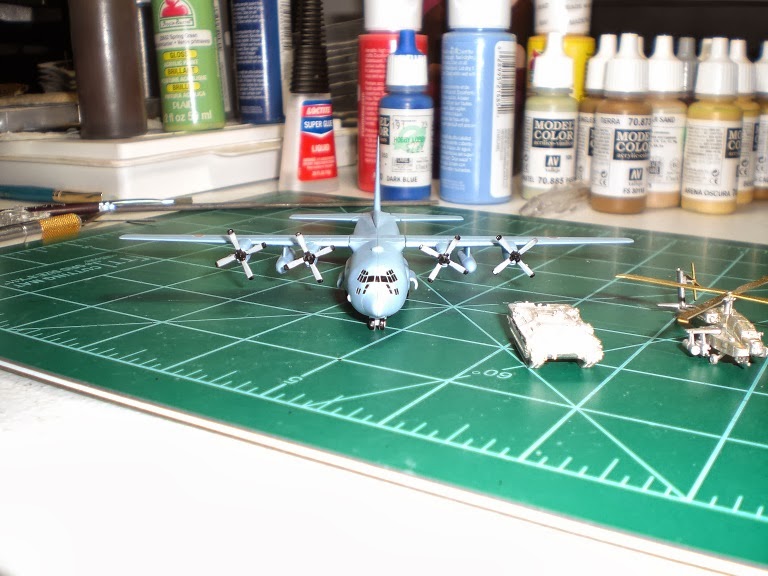
The aircraft comes in several parts protected in a compartmentalized container and has two sprues, one for the landing gear in landed and airborne configurations and the other sprue for the turbo props. I was too excited to get it put together so I didn't get pics of the plane until I had finished it. Sorry about that. But here she is next to a 1/285 GHQ Israeli Namer HAPC and a GHQ AH-64D Seraph attack helicopter.


As you can see from the gears I have opted for the landed configuration. The model will need to have seams filled and sanded but after that she's good to go with a primer coat so I can get her in Israeli colors. Now about that scale. A C-130J's wingspan is 132'. At 1/300 scale this model comes out to just over 5.25" wingspan so it is just about dead on scale wise. However, if my math is correct, at 1/285 scale the wingspan would need to be 5.55". Basically this model is only 0.25" off scale wise which equates to 8' in real life. I can live with that seeing as how the C-130's wingspan ranges from 97' to 132' depending on which version it is B/H/E/J etc..

Anyway my final verdict is that this is a worthy product as a flavor aircraft for any 6mm army that uses C-130s (and there are LOTS of them). You can either have it on display with some units or you can use it as a transport to airdrop infantry or supplies, or even as I stated earlier convert it into an AC-130 gunship and actually use it on tabletop as a combat model which is represented in GHQ's rule set. Would buy again.

12 October 2013

F-16I Sufa 100%

Changed the green. Added decals. Dull coated aircraft and gloss coated the canopy. She's as done as I can make her. As normal, the camera is washing out the color and picking up every single mistake the human eye can't even see.


02 October 2013

99%

The F-16I Sufa is probably about 99% complete at this point. All I need to do to it now is glue in the magnet, apply decals, figure out what I plan on doing for the extravagant tail design, figure out how to paint the windshield, and maybe possibly change the color of green I used because I almost hate it. I matched these colors as close as I could and failed miserably. The tan is too yellow. The brown doesn't have enough red in it. The green doesn't have enough green in it. And the light gray doesn't have enough blue in it. I'm as irritated as I am jubilant for finally getting to this point.

The camo pattern is hand painted to the best ability that my shaky hands possibly can do it. The brown is English Uniform (Vallejo 921), the tan is Beige (Vallejo 917), and the green is Pastel Green (Vallejo 885). The light gray is Blue Gray Pale (Vallejo 905), and the dark gray is a drop of Blue Gray Pale mixed with a drop of black.. The LGB are a drop of Yellow Green (Vallejo 881) and a drop of English Uniform. I painted everything on and then gave it my own wash. If you look back at my previous pictures of ground units you'll notice that I'm using Sepia Ink (Vallejo 091). This ink is nice but it darkens everything. So I looked online for a wash recipe and mixed 4 parts water to 1 part Pledge floor polish and then dumped most of the Sepia ink into the container with a splash of smokey ink to darken it a bit. This wash is wonderful and should hopefully cut my painting time on ground vehicles in half if not more.

Anyway without further delay, I present the nearly completed F-16I Sufa conversion. I took two sets of pictures because I suck at photography. With flash shows detail better but washes out the color pretty badly. For instance, with flash makes the green look more like a sandy tan. Without flash, the green shows up as green but the model is too dark to see much else. I am including both sets of pictures here to give a general idea about the quality. Praise and criticisms welcome. This labor of love has taken me weeks from start to finish and I am glad to have finally [mostly] finished her.


Coming soon, WWII era United States Navy!

13 July 2013

Namer AIFV

While I'm working on all of the M113 variants, I decided to take a whack at one of the Namer armored infantry fighting vehicles for fun. I was complaining about the M113 being a bit boring to paint but these Namers are anything but! Wow what a challenge!

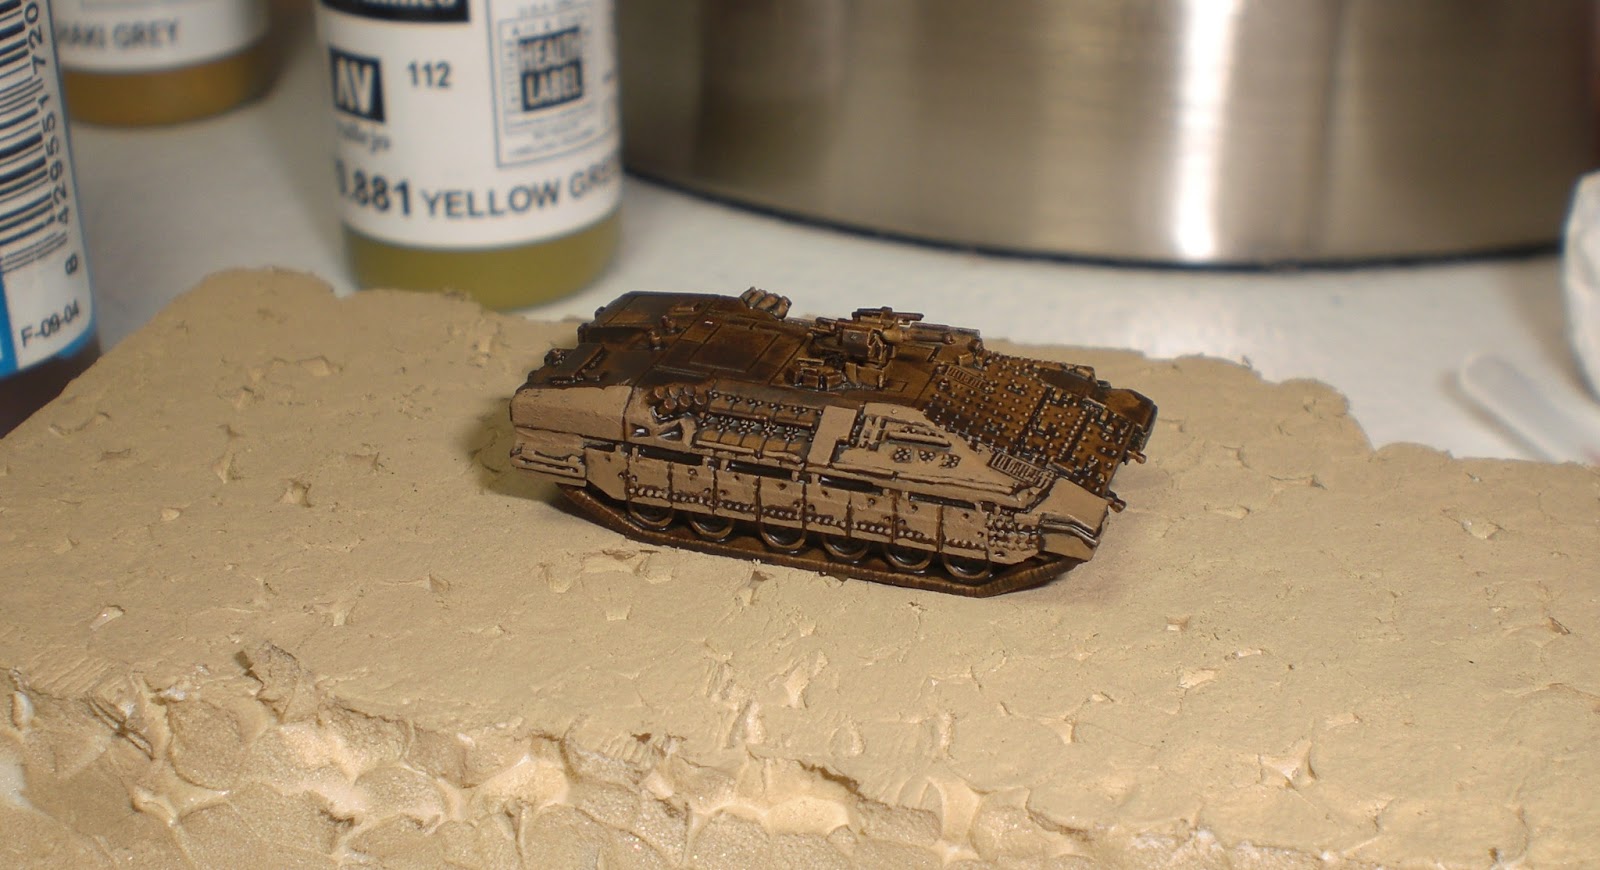
Here is one of them first in primer and then with basecoat and ink with the top coat being picked out by hand. I cannot believe how much detail these things have. People also rail GHQ for the cost of their figures but I think these are a bargain at $2 per hull and certainly worth it. LOOK AT THE DETAIL.