Showing posts with label Israeli Defense Force. Show all posts

29 October 2013

Nemmera ARV Conversions

I've finished most if not all of the work on my Nemmera armored recovery vehicles. These vehicles do exist today but I think they are in prototype stages. They are based on the Merkava MkIII chassis. Here are a few of the best (and only) pics I can find of the actual vehicle.

The crane.


The spare power pack on top. This is the only photo I have ever seen that shows the power pack clearly.


The rear end.


The rear end in action.


And here are the vehicles I created with a Merkava so you can see the start to finish. Green parts were made by me using green stuff putty. White parts are drywall putty. Off-white parts such as the power pack and hatch on top were cast and then parts made from Steel Putty from Walmart (see previous post in 2012 for info on those products). And silver parts are GHQ products. The hull is the Merkava MkIV and the crane and winches are from the AARV-7 Command/Engineer pack from the US line.


25 October 2013

Test Job - GHQ Micro Armour 1/285 Israeli Merkava Mk IV

Just finished a Merkava but it looks completely bland. Not sure what else to do to it to make it more exciting to look at.


16 October 2013

IDF Merkava ABVs

The Merkava armored bridge layers are finished. The conversion went so smoothly that I managed to create both vehicles nearly identically and I could probably do it again and again and again if I wanted to. I think I'm going to need to order another pack of the M104 Wolverines just for the bridge part so I can have them in the extended position and put a phyical model on the table where the bridge is placed.

I pretty much gutted the Wolverines. I cut off any generator looking box thingies off the top of them, the command cuppola/hatch, and the shovel doohickey thingamabob off the front. I think these turned out great and will look fantastic alongside my Merkavas. Who needs M60 ABVs anyway?


I'm working on the ARVs now which I decided to do on Merkava chassis. I'm going to have like 10 spare Merkava IV turrets lying around after all of this is done.

Kitbashing Ultra-Moderns

So with the date of my fictional Israeli/Iranian/Syrian/Egyptian war pushed back to the early 2020s, I now have the opportunity to be somewhat creative with my armies while still retaining roots in modern reality. What I mean is that now my armies have had an extra decade to field more cutting edge equipment possibly narrowing the technological gap between the forces which I think will create a more balanced and fun battle.

First up are a couple of Merkava variants. This first variant is one that existed in the past as a prototype but was axed due to costs. It was the Sholef self propelled howitzer. The vehicle was basically an early Merkava chassis with an early M109 (a1?) turret mounted on it in essence giving the Israelis an M109 artillery piece with the armor of a main battle tank.


This kitbash is stupidly easy for my ultra modern Israeli army. US M109a6 + IDF Merkava MkIV = IDF Sholef MkII.


Next up I thought that by the early 20s that the Israelis would have a modernized bridgelayer that was able to take a beating. Drawing inspiration from the American bridgelayer, the M104 Wolverine, which is built on an M1 chassis, this kitbash was also a no brainer.

US M104 Wolverine + IDF Merkava MkIV = IDF Merkava Bridgelayer (researched name forthcoming).


Now onward to the Namer variants. Right now the Namer exists as a HAPC which is armed with a 12.7mm HMG mounted in a remotely controlled turret and a 7.62mm or 5.56mm LMG manually controlled from the cupola next to it. It can be upgraded to carry an automatic 40mm grenade launcher in the turret but this still hardly makes it an IFV. Possible variants to the Namer that are being planned are an IFV version with a 30mm automatic cannon and Spike ATGM launcher, a MedEvac, Command vehicle, and an ARV.

The first of these kitbashes I am showing is the ARV. Now I wasn't sure what I wanted to use for a crane so I ended up buying two kits for it and chose which I liked best. The US truck with the wrecker arm was good but the AAVR-7 A1 looked closer to pictures I had seen. I have not completely decided yet whether this kitbash will be done with the Merkava or the Namer chassis. Even though the Namer is basically a Merkava chassis, they are quite different especially in size.


US AAVR-7 A1 + IDF Namer = IDF Namer ARV (researched name forthcoming).


Finally is the Namer HIFV. Because I have no idea what the turret would look like I had several options here. I saw what a couple of the turrets that are possible looked like and they occupy the automatic turret spot, stick up really high and look funky like the turrets on the older Achzarit IFVs. The benefit to this type of turret is that the passenger compliment remains at 12 fully armed soldiers. The downside is that the turret doesn't look anywhere near as beefy or armored as the rest of the vehicle. From an aesthetics standpoint, this really bothered me so I instead started looking at "proper" turrets that I could steal from other vehicles. First I looked at the M2 Bradleys. I decided that if I would use a turret like these that it would be only fair to reduce the passenger capacity by at least 2 men to 10. The Bradley can hold 8 but since the Namer is so much larger I felt that 10 would be fine especially seeing as how it only has a crew of 2, driver and a gunner. But the Bradley turret seemed to iconic and American to stick onto an Israeli hull. Then the newest IFV by GHQ immediately popped into my head, the German Puma IFV. After looking at the pictures I was immediately sold. The Puma is armed with a really cool looking futuristic 30mm autocannon and Spike ATGM missiles which is already what the Israelis use anyway. I stuck the turret onto the Namer and that cemented my decision. Some people will bash me for the liberal nature of this design but I really think it fits well with modern IDF armor and it has the exact weapons the Israelis are planning for.

Please note that the Puma turret is just resting on the Namer and so looks funky and isn't positioned exactly where it will be. I have to cut off a hatch. It will be in a similar position on the Namer as it is on the Puma.

GER Puma IFV + IDF Namer HAPC = IDF Namer HIFV (researched name forthcoming).


These are just quick and dirty pictures to show off my ideas for my ultra moderns. There will be a little bit more to the conversions that this. For instance on the ARV mods I will be cutting off the little winches and such and using those on the vehicle as well. I may also end up screwing around with some modeling putty again.

Keep an eye out because I really hope to start showing off some completed work of both my 1/285 IDF and my 1/2400 USN soon. So much to do and so little time to do it in.

25 July 2013

2Aircraft1Tank

Well I've gotten the attack helicopter built. Once again GHQ delivers superb quality and detail. I've looked around at many many other manufacturers of 6mm scale models and I honestly don't know how any of them stay in business. Their models just can't hold a candle to GHQ's. This is a similar situation to when I played Flames of War where I only bought figures from Battlefront because the quality in my opinion was worth the extra expense.

Here is the AH-64D Saraph. Paint is a long ways off as I do not have the proper colors for the IAF. Note that the doodad that sits on top of the main rotor fell off so I have to figure out a good way of securing it. Probably going to need pinned although I have never pinned anything before so it'll be new to me.


Next up is a test Merkava Mk IV. Nothing special here. Just a magnetized turret and custom antennae. The antennae were made by using the bristles from a $1 black paint brush from Walmart. The synthetic ones you'd paint your house with. A $1 brush has enough bristles to give like 100-200 tanks aerials. I felt this was a better option than some of the other ideas I've seen kicked around such as piano wire. The bristles are flexible so you're not having to bend anything back in place.


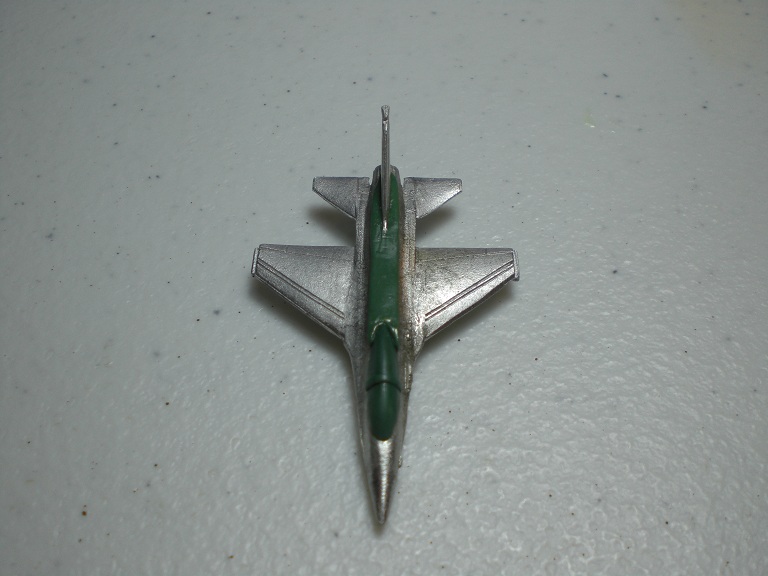
Finally, I bought a GHQ F-16. This model was chosen to become an extensive conversion project to change what appears to be an early model F-16C (Block 30?) into a modern Israeli F-16I Sufa. The only F-16I Sufa currently available in 6mm anywhere is a model on Shapeways at https://www.shapeways.com/model/327961/1-285-6mm-f-16i-sufa.html?li=productBox-search&materialId=62 . That's all good an dandy but I worry about the detail and the material the model is made of. There are no panel lines to speak of and all details must be painted on. The other downside is that that model isn't even an F-16I. It's just an F-16 with CFT (conformal fuel tanks) which aren't even shaped accurately.

What sets the F-16I apart isn't just the use of the CFT but also a modified cockpit that utilizes a crew of 2 instead of 1 and an interesting dorsal spine that runs from the cockpit to the aft stabilizer. Go easy on me with this model because it is the very first time I have ever modeled anything with kneadatite. I've always wanted to play with green stuff but just never had a reason to use it. So far I've gotten the extended cockpit modeled and just finished doing the preliminary work on the dorsal spine. I've gotta wait a day for it to fully cure so I can do some detail sanding on the spine and reduce its size slightly. It also needs to be a bit more teardrop shaped and remain wide in the middle while tapering at either end. I gotta say though, for my first time ever sculpting anything, I am fairly proud of myself.


Up next are the CFT which I am absolutely dreading. They are curvy and I think it is going to be very difficult for me to get them just right. After that I will add some kneadatite under the nose to round out the bottom a bit. The GHQ model is nearly flat under the nose and I don't know why that is but the F-16I is rounded. Finally, I will take some of the bomb pylons the model came with that I will not be using and I will cover them in kneadatite in order to model the 600 gallon drop tanks that many Israeli F-16s use. Having a whole hell of a lot of fun in this GHQ stuff so far.

If you're interested and you chanced upon this blog because of my Flames of War stuff, check out GHQ at http://www.ghqmodels.com/

13 July 2013

Namer AIFV

While I'm working on all of the M113 variants, I decided to take a whack at one of the Namer armored infantry fighting vehicles for fun. I was complaining about the M113 being a bit boring to paint but these Namers are anything but! Wow what a challenge!

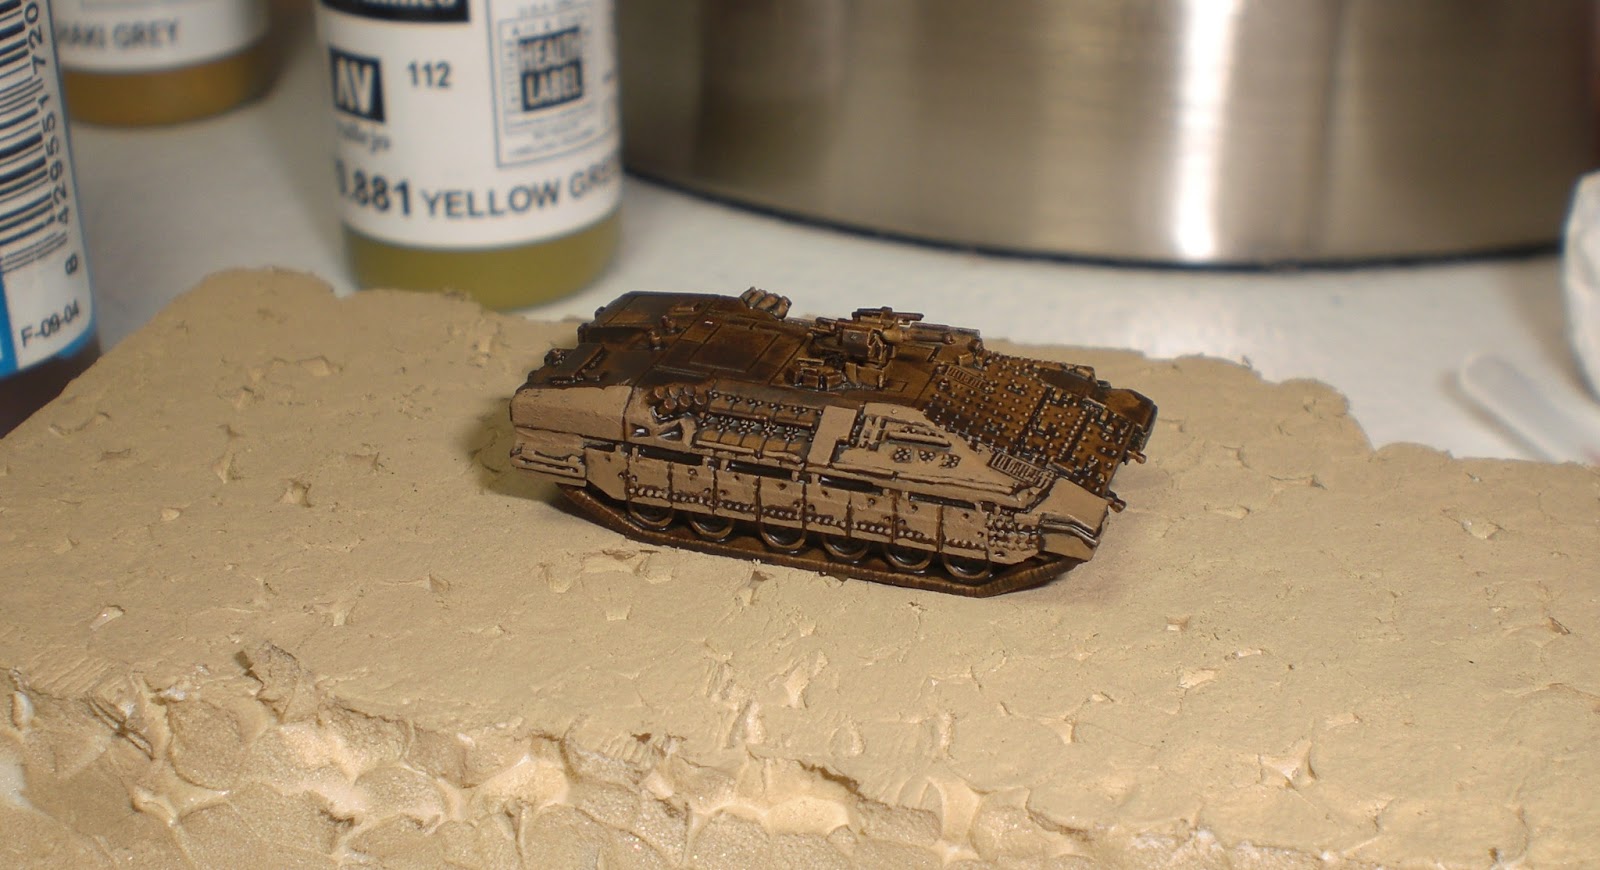
Here is one of them first in primer and then with basecoat and ink with the top coat being picked out by hand. I cannot believe how much detail these things have. People also rail GHQ for the cost of their figures but I think these are a bargain at $2 per hull and certainly worth it. LOOK AT THE DETAIL.


First Submission into 6mm

For my first batch of items I got the Israeli combat force, two packs of Merkava IV, two packs of Namer, and a pack of Apache Longbow, all by GHQ miniatures. So I've got some infantry, 20 Merkava IV, 20 Namer, 11 Zelda (Israeli M113), 1 M125 (M113 mortar carrier), and 1 M109 (M113 TOW). The company I bought the models from screwed up and instead of sending me a pack of 1 AH-64D Apache they sent me a pack of UH-1D Hueys. The Apache is on the way but as I'm building an ultra modern army I don't really know what to do with the Hueys or the M113s for that matter. I'll likely paint them up nice as I can and sell them.

To start out I've done a single test model to get a feel for painting at this scale. I chose to do the M125. I gave it a primer coat of Khaki camo paint from Walmart, base coated it in US Field Drab from Vallejo model color range, and then gave it a sepia ink wash from the Vallejo game color range. At such a tiny scale I decided that it would be a bad idea to do any drybrushing to pick out details so after inking I picked out all the raised areas again with a fine brush in US Field Drab. I then painted some small details such as guns, the mortar, view port, shovel, cabeling, tracks, and hatch levers black.

I thought about doing a light highlight at this point but decided against it because I felt that it would brighten the model too significantly. US Field Drab is an inappropriate color for modern IDF forces (though I have seen several vehicles just a light) because the Israeli sand color is darker. But Israeli sand is hard to match to the Vallejo range and I didn't want to do any mixing so I opted for the US Field Drab so that it would be a close match but also so that any black details would stand out better against the base coat.

I think it turned out nicely and the details on the GHQ models is incredible but it is a rather boring model to paint. It would be more fun if I chose to do some wild camo scheme but the IDF seems to just coat everything in brown and call it good. Even their infantry camo is rather boring in a dull olive drab. I have a limited collection of paints at the moment so I have opted to not do any weathering to the model. I have several colors of sand I could easily brush on but I have nothing in the red spectrum to rust up the tracks. Now it's time to move onto the rest of these M113 things so I can get onto the more exciting models, Namers and Merkavas!